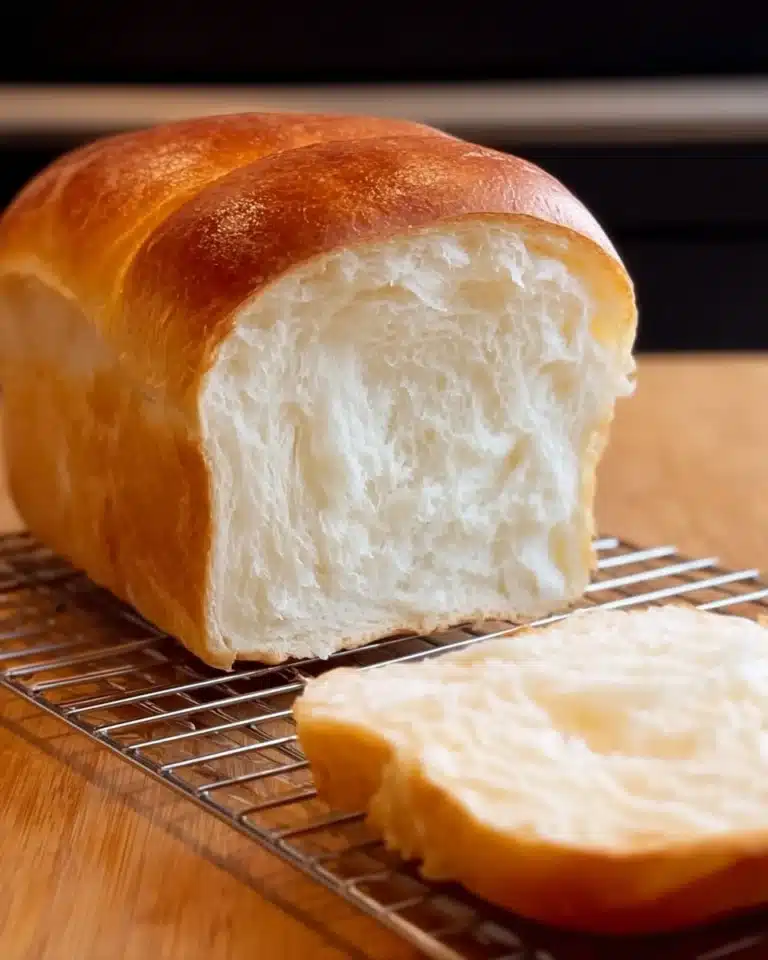
If you have ever dreamed of capturing the aroma and the warm, crispy crust of a freshly baked baguette in your own kitchen, this Homemade French Bread Recipe is your golden ticket. This recipe is all about simple, quality ingredients and a little bit of love to create that classic French bread texture and flavor that pairs perfectly with everything from rustic cheeses to hearty stews. It’s an ultimate comfort food that fills your home with irresistible scents and promises slices of crusty, chewy delight with every bite.
Ingredients You’ll Need

Getting your ingredients right is the secret to a perfect loaf of French bread. Each item plays an essential role, building that delicate balance of crust and crumb that makes this bread so beloved worldwide.
- Warm water (2 cups): The ideal temperature at about 105°F wakes up the yeast for a lively rise without killing it.
- Active dry yeast (1 tablespoon): This magical ingredient ferments the dough, creating air pockets for that light texture.
- Granulated sugar (2 1/2 teaspoons): Just a touch to feed the yeast and help form a lovely crust color as it bakes.
- All-purpose or bread flour (5 cups): The backbone of the bread, its protein content supports the dough’s structure and chewiness.
- Table salt or fine sea salt (2 1/2 teaspoons): Vital for flavor depth and controlling yeast activity for an even rise.
- Olive oil (1 teaspoon): Adds a slight richness and helps keep the crust tender during resting.
- Melted salted butter (optional): For brushing on freshly baked loaves to add a decadent sheen and extra flavor.
How to Make Homemade French Bread Recipe
Step 1: Combine Yeast Mixture
Begin by waking up your yeast in warm water, mixing in the granulated sugar to give it its first meal. After sitting for about 5 minutes, you’ll see a foamy layer form, which tells you the yeast is alive and ready to work its magic.
Step 2: Knead the Dough
Next, mix 2 cups of flour with salt before gradually adding the yeast mixture. Whether you’re using a stand mixer with a paddle or your own two hands, knead in the remaining flour in parts until the dough feels smooth without being sticky. Remember, the climate and flour type can affect how much flour you need – so trust your hands.
Step 3: Let the Dough Rest
Rub olive oil all around the dough ball, which will prevent drying out while it rests under a towel. Let it sit for 15 to 30 minutes or up to an hour if you can wait. This short rest period helps relax the gluten, making the next steps easier and lending to better texture.
Step 4: Shape the Loaves
Turn the dough out onto a floured surface and divide it into two halves. Roll each portion into a rectangle then carefully roll it into a tight cylinder, tucking in the edges to create that classic baguette shape.
Step 5: Final Rise
Arrange the formed loaves on your prepared baking sheet, make three diagonal slashes on each with a sharp knife, cover lightly with a towel, and let them rise again for 30 to 60 minutes. This final rise is crucial—allowing your bread to develop its airy crumb and that iconic crusty exterior.
Step 6: Bake to Golden Perfection
Preheat your oven to 400°F and slide the loaves in with a silicone mat or parchment paper beneath. Bake for 17 to 23 minutes until golden brown and hollow sounding when tapped. If they’re browning too quickly, tent with foil and drop the temperature slightly to 375°F, ensuring each loaf bakes evenly.
Step 7: Serve Warm and Buttery
Right out of the oven, brush your loaves with melted salted butter if you love that extra golden sheen and rich flavor. Slice while still warm to enjoy the bread’s full aroma and tender crumb.
How to Serve Homemade French Bread Recipe

Garnishes
A perfect loaf of French bread hardly needs much, but if you want to step up the presentation, a sprinkle of flaky sea salt or a brush of garlic butter can elevate your homemade baguette to a total crowd-pleaser. Fresh herbs like rosemary or thyme also add a lovely aromatic touch.
Side Dishes
This bread shines alongside soups like French onion or creamy bisques, and also pairs wonderfully with classic charcuterie boards. Use it to mop up rich sauces or as a base for bruschetta loaded with tomatoes, mozzarella, and basil—its versatility is endless.
Creative Ways to Present
Imagine slicing your French bread into thick rounds and topping them with melted cheese and caramelized onions for a quick appetizer. Or use it to make a rustic bread bowl filled with creamy dips. The golden crust provides a visual and textural delight no matter how you choose to serve it.
Make Ahead and Storage
Storing Leftovers
If you have leftover bread, store it in a paper bag or a loosely closed bread box to maintain the crust’s crispness while preventing it from going stale too quickly. Avoid plastic bags unless you want a softer crust.
Freezing
French bread freezes beautifully. Wrap whole loaves tightly in foil or place slices between parchment paper inside a freezer bag. When frozen properly, it stays fresh for up to three months, ready to be thawed and enjoyed anytime.
Reheating
To bring your bread back to life, reheat in a preheated oven at 350°F for 10 to 15 minutes. This restores the crust’s crunch and warms the soft interior perfectly, almost as if freshly baked.
FAQs
Can I use bread flour instead of all-purpose flour?
Absolutely! Bread flour has a higher protein content which develops more gluten, giving your bread a chewier texture and a better rise. You can swap it one-to-one or even mix both flours to customize the texture.
How do I know if my yeast is still good?
If your yeast mixture foams and bubbles after sitting in warm water with sugar for about 5 minutes, it’s active and good to go. If not, it’s best to get a fresh batch to avoid a dense loaf.
Why should I make diagonal cuts on the dough?
These slashes aren’t just decorative; they allow the bread to expand during baking without cracking unpredictably, ensuring a beautiful shape and an even crust.
Can I make this bread without a stand mixer?
Definitely! This recipe is hands-on friendly. Kneading by hand takes a bit more effort but it’s wonderfully therapeutic and yields equally fantastic results.
How long does the dough need to rise?
After the initial rest, a rise of 30 to 60 minutes once shaped allows the dough to develop its airy crumb and flavor. If you have more time, longer rising will create an even lighter texture.
Final Thoughts
Baking your own French bread is one of those profoundly satisfying kitchen adventures that fills your home with warmth and joy. This Homemade French Bread Recipe brings you all the crackling crust, tender bite, and captivating aroma you crave. So gather your ingredients, roll up your sleeves, and trust the process—you’re just moments away from slicing into your very own masterpiece that tastes like a true bakery treasure.
Print
Homemade French Bread Recipe
- Total Time: 1 hour 30 minutes
- Yield: 2 loaves (32 servings)
Description
This Homemade French Bread recipe delivers classic, crusty loaves with a soft interior, perfect for sandwiches or as an accompaniment to any meal. Made from simple ingredients like flour, yeast, and water, this recipe guides you through mixing, kneading, rising, and baking for authentic bakery-style French bread at home.
Ingredients
Dough Ingredients
- 2 cups warm water (about 105°F)
- 1 tablespoon active dry yeast
- 2 1/2 teaspoons granulated sugar
- 5 cups (650 g) all-purpose flour or bread flour (add more as needed)
- 2 1/2 teaspoons table salt or fine sea salt
- 1 teaspoon olive oil
Optional
- Melted salted butter (for brushing)
Instructions
- Combine: In a small bowl, combine the warm water, active dry yeast, and sugar. Let the mixture sit for 5 minutes, or until it begins to foam, indicating that the yeast is active.
- Knead: In a stand mixer fitted with a paddle attachment or a large mixing bowl, stir together 2 cups of flour and the salt. Gradually stir in the yeast mixture on medium-low speed or by hand. Knead in an additional 1/2 cup of the remaining flour in increments until the dough is smooth but not sticky. You may need to add more flour depending on your climate and flour type.
- Rest: Rub the olive oil around the dough ball to prevent drying. Cover the bowl with a towel and let the dough rest for 15 to 30 minutes. For better flavor and texture, you can let it rise up to 1 hour.
- Roll: Turn the dough onto a well-floured surface and divide it in half. Set one half aside. Roll the other half into a rectangle approximately 15 inches long. Starting from the long edge, roll the dough tightly into a cylinder shape.
- Rise: Fold both ends of the cylinder inward and pinch the seams closed to seal. Shape the edges to be rounded and place the loaf onto a prepared baking sheet. Repeat the rolling and shaping with the second dough ball. Use a sharp knife to make three diagonal cuts across the top of each loaf. Lightly cover the loaves with a towel and allow them to rise for 30 to 60 minutes; a longer rise will improve the bread’s texture.
- Bake: Preheat your oven to 400°F (204°C). Line a baking sheet with a silicone mat or parchment paper to prevent sticking. Place the loaves in the oven and bake for 17 to 23 minutes, until the crust is golden brown. To check doneness, tap the bottom of the bread – it should sound hollow. If the bread is browning too quickly, lightly cover with foil and reduce the oven temperature to 375°F (190°C).
- Serve: Optionally, brush the tops of the hot loaves with melted salted butter for a delicious richness. Slice the bread and serve warm for the best flavor and texture.
Notes
- Use warm water to activate the yeast, ideally between 100°F and 110°F; too hot will kill the yeast.
- Adjust flour quantity as needed depending on humidity and brand to get the right dough consistency.
- Longer proofing times improve flavor and crumb structure but are optional based on schedule.
- Brushing butter on the crust after baking adds a lovely shine and flavor but can be omitted for a leaner bread.
- Store bread in a paper bag or wrapped in cloth to maintain crust crispness; freeze leftovers.
- Prep Time: 20 minutes
- Cook Time: 23 minutes
- Category: Bread
- Method: Baking
- Cuisine: French