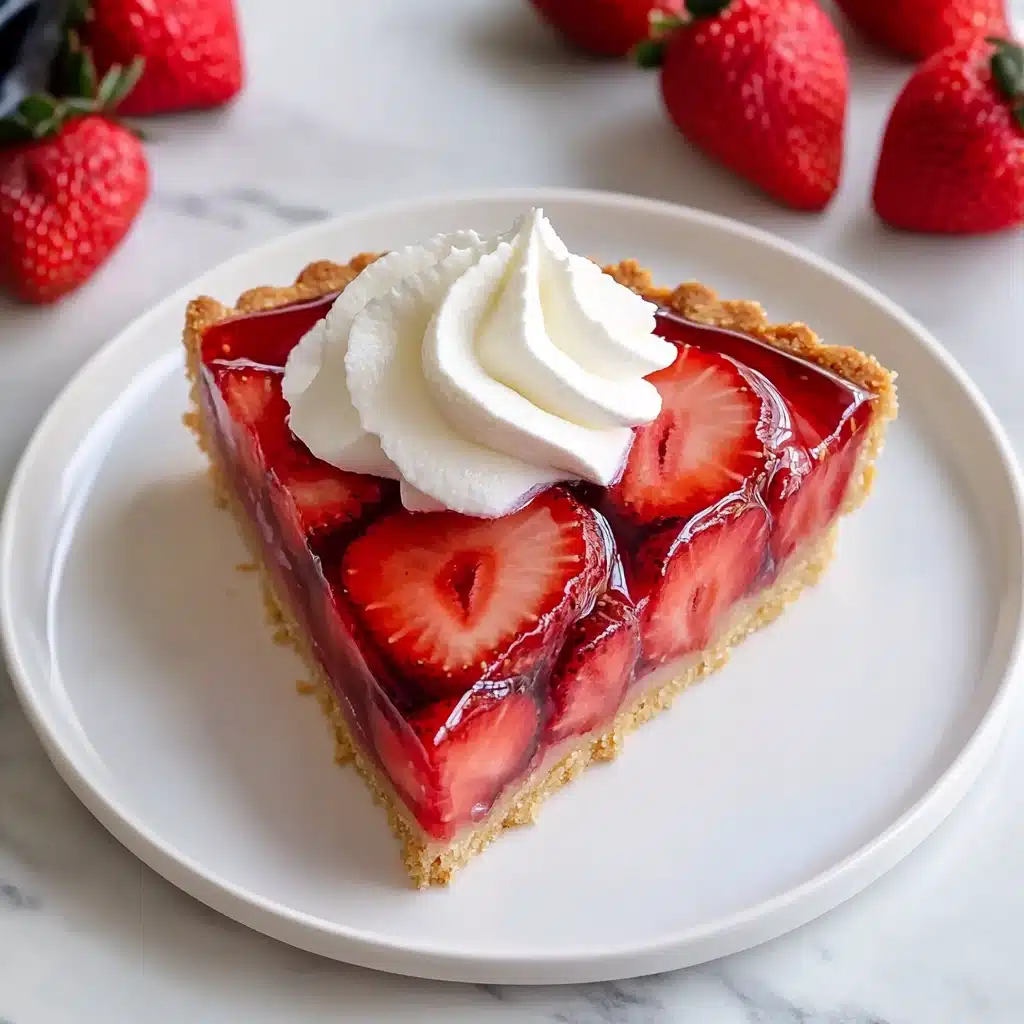
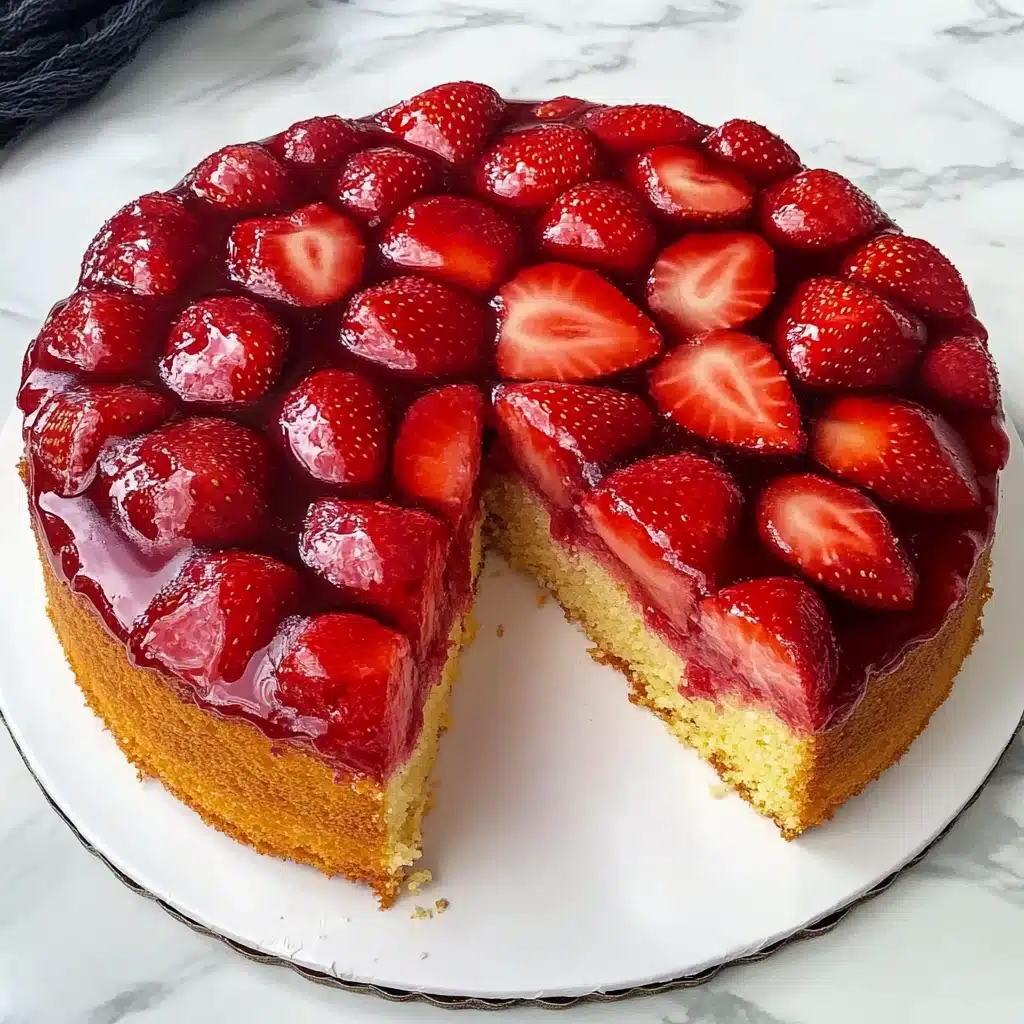
If you’re searching for the ultimate showstopper for spring and summer gatherings, Traditional Strawberry Upside Down Cake is the answer. This classic dessert features sweet, juicy strawberries cloaked in a caramelized syrup that soaks into a tender vanilla cake, resulting in a slice that looks as bright and cheerful as it tastes. It’s the kind of cake that steals the spotlight wherever it goes, and the magical moment of flipping it over never, ever gets old. Trust me, from backyard brunches to special occasions, Traditional Strawberry Upside Down Cake always brings smiles and a sense of nostalgia.
Ingredients You’ll Need
You might be surprised at how little you need to make something this delightful! Each ingredient in the Traditional Strawberry Upside Down Cake brings a special touch—juiciness, richness, or fluffiness—and together, they create a dessert that’s far more than the sum of its parts.
- Strawberries (4 cups, sliced): Fresh, ripe berries offer the showy color and sweet, slightly tart flavor that define the topping’s signature look.
- Butter (7 tbsp, melted): Three tablespoons for the batter, four for the strawberry mixture—this is what gives both the cake and fruit layers their golden richness and lovely mouthfeel.
- White Sugar (1/2 cup for batter + 1/3 cup for topping + optional 2 tbsp): Adds sweetness to both the cake and strawberries, helping the fruit layer caramelize into glossy perfection.
- Eggs (2 large): The backbone of a moist, springy crumb, and essential for structure.
- Vanilla Extract (1 tsp): A splash boosts depth and warmth, pairing beautifully with the berries.
- Buttermilk (3/4 cup): Keeps the cake extra tender and tangy, balancing out the sweetness of the topping.
- Self-Rising Flour (1 1/2 cups): This shortcut ensures a lofty, fluffy cake without fussing over extra leavening.
- Optional: Extra butter and sugar (2 tbsp each): For a more decadent caramelized fruit topping, toss these with your strawberries before layering.
- Cooking spray: To guarantee your cake releases perfectly from the pan without sticking.
How to Make Traditional Strawberry Upside Down Cake
Step 1: Preheat Oven and Prepare Cake Pan
Start by preheating your oven to 350°F (175°C)—this ensures an even bake right from the beginning. Take a 10-inch cake pan and give it a thorough coating of nonstick spray. Since the beauty of a Traditional Strawberry Upside Down Cake is all in the glorious fruit top, a well-greased pan is your secret weapon to a flawless cake flip.
Step 2: Prepare the Cake Batter
Gather up your batter ingredients: white sugar, eggs, melted butter, vanilla, buttermilk, and self-rising flour. In a mixing bowl, beat the sugar, eggs, and melted butter until the mix turns pale and fluffy—this is key for a light cake structure. Add in the vanilla and buttermilk, blending just to combine, then gently fold in the self-rising flour. The moment all the flour is incorporated, stop mixing! Overworking can make the cake tough; we want tender and airy.
Step 3: Prepare and Layer the Strawberries
Take the crowns off your strawberries and slice them evenly. If you like things extra sweet and syrupy, toss the berries with 2 tablespoons of sugar and 2 tablespoons of melted butter (totally optional, but highly recommended for extra caramelization). Layer these glossy strawberries evenly across the bottom of your prepared cake pan, setting the stage for that showstopping top.
Step 4: Assemble the Cake
Now comes the magic moment: pouring the cake batter right over your strawberry layer! Use a spatula to coax the batter into every nook and cranny, making sure it covers all the fruit and reaches the edges. A smooth, even layer means a gorgeous “upside down” presentation once it’s flipped.
Step 5: Bake the Cake
Place your cake pan in the center of the hot oven and bake for 50 to 55 minutes, until the top is deeply golden and a toothpick poked into the center comes out mostly clean. I find rotating the pan halfway through helps guarantee even color. The aroma at this stage is irresistible—berry-sweet, buttery, and rich!
Step 6: Cool and Invert the Cake
Once out of the oven, patience is key. Let the pan cool for 15 minutes—this rest allows the juicy topping to set just enough. Run a knife around the sides, then the big reveal: place a serving plate on top of the cake, and carefully flip! The warm strawberries will glisten on top, dripping a little sauce around the edges. Let it cool for another few minutes, then slice and enjoy every gooey, fruity, golden bite.
How to Serve Traditional Strawberry Upside Down Cake
Garnishes
There’s almost no need to gild the lily, but a dollop of pillowy whipped cream, a scoop of vanilla ice cream, or a dusting of powdered sugar take your Traditional Strawberry Upside Down Cake to new heights. For something a little different, try a drizzle of strawberry sauce or a sprinkle of chopped toasted almonds—it adds a little crunch and a nutty balance to the sweet fruit.
Side Dishes
For brunch, serve a slice alongside a fresh fruit salad or a pitcher of cold brew coffee for that sweet and tangy balance. If it’s dessert after dinner, a scoop of coconut gelato or lemon sorbet pairs wonderfully, cutting through the richness of the cake while letting the ripe strawberry flavors shine.
Creative Ways to Present
If you want to impress at a party, bake your Traditional Strawberry Upside Down Cake in individual ramekins for adorable single portions. Or, arrange extra sliced strawberries atop the cake in a sunburst pattern before baking for a stunning design once flipped. Feeling playful? Serve with homemade strawberry milk or layer leftovers into parfait glasses with more berries and whipped cream for a rustic, trifle-style treat.
Make Ahead and Storage
Storing Leftovers
Leftover Traditional Strawberry Upside Down Cake will keep beautifully for up to 3 days when stored in an airtight container in the fridge. The juicy strawberry layer helps the cake stay moist, but to avoid any refrigerator odors creeping in, make sure it’s well covered. If the cake starts to release extra syrup, simply spoon it over the top when serving for extra goodness.
Freezing
Want to enjoy a piece of summer even months later? You can freeze individual slices of cake wrapped first in plastic wrap, then in foil or a freezer bag, for up to 2 months. Defrost overnight in the fridge before eating. Do note that the strawberry topping may get slightly softer after freezing, but the flavor will still be wonderful.
Reheating
For that fresh-from-the-oven experience, gently reheat slices of Traditional Strawberry Upside Down Cake in the microwave for about 15–20 seconds, or in a low (300°F) oven for 5–10 minutes. The cake will return to its fluffy, tender texture, and the topping will go gooey and aromatic all over again. Wonderful served warm with ice cream or cream!
FAQs
Can I use frozen strawberries in my Traditional Strawberry Upside Down Cake?
Absolutely! Frozen strawberries work in a pinch. Make sure to thaw and drain them thoroughly before using, so you don’t end up with a soggy cake. Pat them dry with paper towels before arranging in the pan.
What can I use if I don’t have self-rising flour?
No problem at all. For every cup and a half of self-rising flour, use 1 1/2 cups all-purpose flour mixed with 2 teaspoons baking powder and 1/2 teaspoon salt. This simple swap ensures your cake bakes up beautifully light and tender.
How long should I wait before flipping the cake?
Letting the cake cool for about 10 to 15 minutes is ideal. If you flip too soon, the topping might be too runny; too late, and the syrup could stick to the pan. Ten to fifteen minutes strikes the perfect balance for a neat, glossy fruit top.
Can I make Traditional Strawberry Upside Down Cake a day ahead?
Yes! One of the best things about this cake is that it holds up very well made ahead of time. Store covered in the fridge until ready to serve, and let it come to room temperature or gently rewarm before slicing.
Why is my strawberry layer runny?
Strawberries are naturally juicy! If the layer is looking a bit runny, it’s usually because of extra moisture in the berries. To combat this, always pat your strawberries dry before laying them in the pan and avoid extra sugar unless you want a syrupier topping.
Final Thoughts
There’s nothing quite like sharing a homemade Traditional Strawberry Upside Down Cake with people you love. It’s the type of dessert that feels both comforting and celebratory, with the juicy berries and golden cake promising happiness in every bite. If you haven’t tried this recipe yet, now’s the perfect time—gather your favorite strawberries, and let the magic begin!
Print
Traditional Strawberry Upside Down Cake Recipe
- Total Time: 1 hour 15 minutes
- Yield: 8–10 servings
- Diet: Vegetarian
Description
This Traditional Strawberry Upside Down Cake is a nostalgic, crowd-pleasing dessert made with sweet, juicy strawberries and a golden, tender cake. Using simple pantry staples and fresh fruit, it’s a stunning treat that’s easier than it looks. Perfect for spring gatherings or family parties, the cake offers a beautiful red topping and mouthwatering aroma straight from the oven. Make-ahead friendly, foolproof, and full of old-fashioned comfort, it’s a sure way to bring smiles to your table.
Ingredients
For the Strawberry Layer
- 4 cups sliced strawberries
- 4 tbsp melted butter
- 1/3 cup granulated sugar
- (Optional) 2 tbsp extra granulated sugar, for more caramelization
- (Optional) 2 tbsp extra melted butter, for richer topping
For the Cake Batter
- 1/2 cup white sugar
- 2 large eggs (room temperature)
- 3 tbsp melted butter (slightly cooled)
- 1 tsp vanilla extract
- 3/4 cup buttermilk (room temperature)
- 1 1/2 cups self-rising flour
Instructions
- Preheat & Prepare Pan: Preheat your oven to 350°F (175°C). Spray a 10-inch cake pan with baking spray to ensure the cake comes out easily after baking.
- Make the Cake Batter: In a large mixing bowl, combine 1/2 cup white sugar, 2 eggs, and 3 tablespoons melted (but cooled) butter. Beat with a mixer until light and fluffy. Add 1 teaspoon vanilla extract and 3/4 cup buttermilk, mixing until just combined. Gradually fold in 1 1/2 cups self-rising flour, mixing until just incorporated. Set aside to avoid overmixing, as this can create a dense cake.
- Prepare the Strawberry Mixture: Remove the crowns and slice the strawberries evenly. In a separate bowl, toss the berries with 4 tablespoons melted butter and 1/3 cup sugar. If you like more caramelization and sweetness, add the optional 2 tablespoons sugar and 2 tablespoons butter. Spread the strawberry mixture evenly in the bottom of the prepared cake pan.
- Assemble the Cake: Pour the prepared batter over the strawberries in the cake pan. Use a spatula to gently spread it, completely covering the fruit for even baking and flipping.
- Bake: Bake for 50–55 minutes, until the top is golden and a toothpick inserted in the center comes out clean. Rotate the cake pan halfway through baking for even coloring if desired.
- Cool & Invert: Let the cake cool in the pan for 15 minutes. Run a knife around the pan’s edges, then cover the pan with a serving platter and, using oven mitts, carefully flip it over so the cake is inverted with strawberries on top. Lift off the pan and allow the cake to cool slightly before slicing and serving.
Notes
- For best results, pat the strawberries dry with paper towels before using to prevent a soggy cake.
- Room temperature eggs and buttermilk help the cake bake up lighter and more evenly.
- If you don’t have self-rising flour, use 1 1/2 cups all-purpose flour + 2 teaspoons baking powder + 1/2 teaspoon salt.
- Use a non-stick or well-seasoned cast iron pan for easy unmolding.
- Don’t wait too long to invert; after 15 minutes the syrup is still runny and will keep the top glossy and easy to unmold.
- Store leftovers in an airtight container in the fridge for up to 3 days.
- Prep Time: 20 minutes
- Cook Time: 55 minutes
- Category: Desserts
- Method: Baking
- Cuisine: American
Nutrition
- Serving Size: 1 slice (1/10 of cake)
- Calories: 150–160
- Sugar: 17 g
- Sodium: 220 mg
- Fat: 6 g
- Saturated Fat: 3.5 g
- Unsaturated Fat: 2 g
- Trans Fat: 0 g
- Carbohydrates: 25 g
- Fiber: 1.5 g
- Protein: 2.5 g
- Cholesterol: 45 mg

