If you’re craving a wonderfully soft yet crispy bread with a burst of savory flavor, then the Salt Bread (Shio Pan) Recipe is the perfect treat to make at home. This delightful Japanese-style bread combines a tender crumb with a slightly salted, golden crust that melts in your mouth, making it an irresistible snack or breakfast companion. Whether you’re new to bread baking or a seasoned pro, this recipe promises a comforting, flavor-packed experience that you’ll want to share with everyone you know.
Ingredients You’ll Need

The beauty of the Salt Bread (Shio Pan) Recipe lies in its simplicity. Each ingredient is chosen with care to build a harmonious flavor profile and achieve that perfect fluffy texture with just the right crunch on the outside.
- Bread flour (12.7% protein): Provides the strong gluten structure needed for a chewy yet soft crumb.
- Cake flour (10% protein): Adds tenderness to the bread for a delicate bite.
- Instant dry yeast: The magic that helps the dough rise beautifully and become airy.
- Sugar: Balances the saltiness and feeds the yeast for a gentle rise.
- Salt: Enhances flavor and creates the signature seasoned crust.
- Unsalted butter or refined coconut oil: Adds richness and tenderness, elevating the bread’s flavor.
- Skim milk powder: Improves the bread’s color and enriches the taste.
- Water: Hydrates the flour, bringing the dough together and controlling texture.
- Whole beaten egg: Helps with dough structure and gives a beautiful golden hue when included.
- Butter blocks: Placed inside the rolls to create a delightful buttery center as the bread bakes.
- Guerande salt, pretzel salt, or rock salt: To sprinkle on top, giving that characteristic salty crunch that defines shio pan.
How to Make Salt Bread (Shio Pan) Recipe
Step 1: Preparing the Dough
Begin by weighing all your ingredients to ensure consistency – weights really make a difference here. Mix the bread flour, cake flour, and water on low speed until a rough dough forms. Then cover it for a 15-minute rest, known as autolyse, which helps develop the gluten gently. After that, add your milk powder, sugar, salt, yeast, and egg if you’re using it, and continue mixing until combined. Finally, incorporate the softened butter or coconut oil until the dough becomes smooth and elastic.
Step 2: Kneading and First Proofing
Give the dough a final kneading session to develop that perfect stretchy texture, either by machine or by hand using the push-fold-turn method. Shape it into a ball and place it in a bowl covered with a cloth. Let it rise in a warm spot for about 80 to 100 minutes or until it doubles in size. This first proof is essential to develop flavor and create those lovely air pockets.
Step 3: Dividing and Shaping
Once your dough has risen, lightly dust your work surface and gently punch the dough down to release gas. Divide it into six equal pieces, roughly 70 grams each. Shape each piece by stretching and rolling it into a thin icicle shape, around 15 cm long, making sure to tuck the edges neatly. Now, place a cold butter block at the base of each dough piece and roll the dough carefully so the butter is enclosed inside without sealing it too tightly. This step creates the wonderfully buttery pockets you’ll love inside the bread.
Step 4: Second Proof
Place the shaped rolls seam side down on your baking tray and cover them. Let them proof for around 55 to 65 minutes in a warm environment, aiming for a puffy, doubled size. The dough should be soft and airy to the touch but still spring back slowly when poked, indicating it’s ready for baking.
Step 5: Baking
Preheat your oven to 232°C (450°F). Just before baking, spray the dough lightly with water to encourage a crispy crust, then sprinkle your choice of coarse salt evenly on top. Use the steam setting if your oven has it, or quickly spray water inside as you close the door to create steam. Bake the rolls for about 12 to 14 minutes, reducing the temperature to 210°C after the initial steaming. Rotate the tray halfway through for an even golden crust that is crispy and inviting. When done, brush the melted butter that leaks out on top for extra shine and richness.
How to Serve Salt Bread (Shio Pan) Recipe
Garnishes
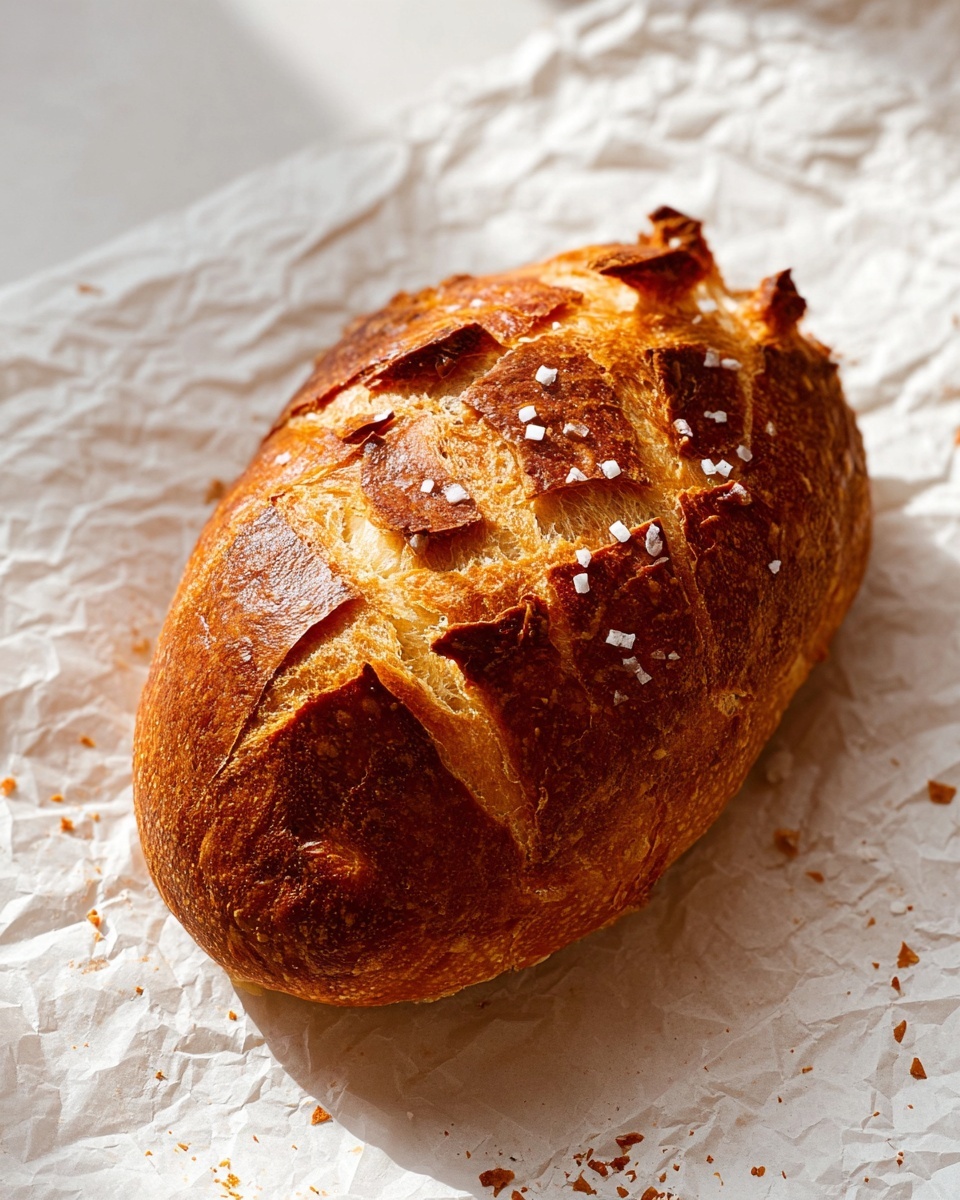
Salt Bread (Shio Pan) truly shines on its own thanks to the delicate balance of flavors, but you can elevate it with simple garnishes. A light brush of melted butter after baking adds a glossy finish and extra indulgence. Fresh herbs like finely chopped rosemary or thyme sprinkled on top before baking introduce a fragrant twist that pairs beautifully with the buttery notes.
Side Dishes
This bread makes an excellent companion to soups and stews — imagine dipping a warm, salty shio pan into a rich tomato bisque or hearty beef stew. It’s also perfect alongside a crisp green salad dressed with a citrus vinaigrette for a lighter meal, or served with soft cheeses like brie or goat cheese for a decadent snack.
Creative Ways to Present
For a fun touch, you can slice the salt bread and use it as mini sandwich buns, filling them with savory spreads, deli meats, or fresh veggies. Toasted slices topped with avocado and a pinch of red pepper flakes make for a stunning appetizer. The soft interior with buttery pockets also invites you to create small bread bowls for creamy dips or even dessert spreads like chocolate hazelnut.
Make Ahead and Storage
Storing Leftovers
If you happen to have any leftover Salt Bread (Shio Pan) Recipe, store them in an airtight container or bread bag at room temperature. They are best eaten within two days for maximum freshness and softness. Keeping the bread sealed prevents it from drying out and keeps those buttery pockets tender.
Freezing
For longer storage, freeze the baked rolls wrapped tightly in plastic wrap and then placed in a freezer bag. This method preserves their texture and flavor for up to one month. When you’re ready to enjoy them, thaw at room temperature or gently warm in the oven before serving.
Reheating
To revive the fresh-out-of-the-oven experience, reheat the bread in a preheated oven at 180°C (350°F) for about 5 to 7 minutes. This will crisp up the crust once again and warm the buttery center without drying out the bread. Avoid microwaving to prevent a chewy, tough texture.
FAQs
What is the key to getting the perfect crust on Salt Bread (Shio Pan) Recipe?
Creating steam in the oven during the first few minutes of baking helps develop a crispy, shiny crust. Spraying water and using settings like steam mode encourages that lovely texture while keeping the inside soft and moist.
Can I substitute the butter with something else?
Yes, refined coconut oil is a great vegan-friendly alternative that works just as well to enrich the dough and produce a tender crumb. Just make sure it’s refined to avoid overwhelming flavors.
Is it necessary to use both bread flour and cake flour?
Using a combination balances the protein content, contributing to structural integrity from the bread flour and softness from the cake flour. But if you only have bread flour, you can still make the bread with a slightly denser texture.
How do I know when the dough is proofed enough?
The dough should double in size and feel airy with a gentle spring back when poked. This indicates the yeast has done its job, ensuring a light and fluffy bread after baking.
Can I make the dough ahead and bake later?
Absolutely! You can refrigerate the shaped dough after the second proof for a slow rise overnight. Just bring it back to room temperature before baking to let it puff up fully.
Final Thoughts
There’s something truly special about baking the Salt Bread (Shio Pan) Recipe at home. Its crispy, salty crust paired with a soft, buttery inside is the kind of comforting delight that feels like a warm hug. I encourage you to dive into this recipe and enjoy every step — from kneading the dough to savoring that first bite fresh from your oven. Happy baking and enjoy your delicious shio pan!
Print
Salt Bread (Shio Pan) Recipe
- Total Time: 45 minutes plus 2 to 3 hours of rising and proofing
- Yield: 6 servings
Description
Salt Bread (Shio Pan) is a popular Japanese-style soft bread filled with a block of butter and sprinkled with coarse salt on top, offering a perfect balance of savory richness and fluffy texture. This recipe uses a combination of bread and cake flours to achieve the ideal protein content for a mild yet elastic crumb. The dough is meticulously kneaded, proofed, and shaped around butter blocks before baking with steam to create a golden, crispy crust with a soft buttery center.
Ingredients
Dough Ingredients
- 1 1/3 cup + 1/2 tbsp (170 g) bread flour (12.7% protein)
- 1/3 cup + 2 tbsp (55 g) cake flour (10% protein)
- 2/3 tsp (3.4 g) instant dry yeast
- 1 tbsp + 1/2 tsp (14 g) sugar
- 1 tsp (4.5 g) salt
- 1 tbsp + 1/2 tsp (16 g) unsalted butter or refined coconut oil, room temperature
- 2 tbsp + 1 tsp (14 g) skim milk powder
- 1/2 cup + 2-2.5 tbsp (158–166 ml) water (adjust temperature between 20–30°C depending on kitchen temperature)
Additional Ingredients for Egg-based Dough
- 1 cup + 2 tbsp (138 g) bread flour (12.7% protein)
- 2/3 cup + 1.5 tbsp (94 g) cake flour (10% protein)
- 1 tsp (4.5 g) salt
- 2/3 tsp (3.4 g) instant dry yeast
- 4 tsp (16 g) sugar
- 2 tbsp (12 g) skim milk powder
- 1 tbsp + 1/2 tsp (16 g) unsalted butter or refined coconut oil, room temperature
- 2 tbsp (28 g) whole beaten egg
- 1/2 cup + 2 tbsp (145 ml) water (adjust temperature between 20–30°C depending on kitchen temperature)
For Assembly and Baking
- 6 butter blocks, 10-14 grams each (14-20% of the dough weight) cut into approximately 2 cm x 4 cm for round salt bread or 1 cm x 6 cm for crescent shaped
- Guerande salt, pretzel salt, rock salt, or any coarse fancy salt for sprinkling
Instructions
- Preliminary Steps: Weigh all ingredients accurately using a kitchen scale for best results. Adjust water temperature according to kitchen temperature using the formula: Water temp = (ideal temp x 3) – (room temp + flour temp + friction factor). Use 25–28°C water if kitchen is 22–24°C, warmer if cooler kitchen, and cooler if warmer kitchen.
- Kneading the Dough: Combine bread flour, cake flour, and water in a stand mixer on low speed to form a rough dough. Cover and autolyse for 15 minutes. Add skim milk powder, sugar, salt, yeast, and beaten egg if using; mix on low for 5 minutes. Add butter or coconut oil and mix low for 2 minutes, then medium speed for 2–3 minutes until the dough is smooth. Rest the dough covered for 15–25 minutes depending on ambient temperature. Mix again on medium speed for 2–3 minutes until the dough no longer sticks to the bowl sides.
- Forming the Dough Ball: Shape the dough into a tight ball, place it in a bowl, and cover. Aim for an ideal dough temperature of approximately 25°C.
- First Proof: Let the dough rise at 28–30°C for 80–100 minutes, or until doubled in size.
- Prepare Butter Blocks: Cut butter into six blocks weighing 10–14 grams each. Keep them frozen after cutting to help with shaping the dough.
- Divide and Shape: Lightly dust the dough surface and transfer to a floured work surface. Punch down and re-dust lightly. Divide into six triangular pieces about 70 grams each. Pinch and shape each piece into a thin icicle form approximately 15 cm long. Rest covered for 15 minutes to relax gluten.
- Shape Around Butter: Flatten the dough piece gently, roll into a long icicle shape removing air bubbles by pressing them out. Place a butter block at the base of the dough and fold the top edge over the butter, rolling down snugly but not too tight or loose. Place seam side down on a parchment-lined or buttered dark baking tray for a crunchy bottom crust. Cover and repeat for all pieces.
- Second Proof: Let the shaped dough rise at 30–33°C for 55–65 minutes until doubled in size and puffy. The dough should spring back slowly when poked, leaving a faint indent.
- Preheat Oven: Preheat oven to highest temperature, typically 232°C (450°F), allowing 20–30 minutes for full heat.
- Prepare for Baking: Remove cover from proofed dough, lightly spray water on top, and sprinkle with coarse salt evenly. Spray dough 10 times just before placing it in the oven. Quickly spray oven walls about 15 times and close door immediately to trap steam.
- Baking: Bake with steam for first 3–5 minutes. Reduce heat to 210°C (conventional) or 190–200°C (convection). Bake for 12–14 minutes until golden and crispy. Rotate baking tray in last 5–8 minutes to ensure even browning. Optionally, remove steam after initial baking and continue baking for 8–10 more minutes if needed.
- Finishing: Remove from oven and brush leaked butter on the tops for extra flavor. Serve immediately for best texture and taste.
Notes
- Use a kitchen scale for accuracy as flour and water measurements are critical for bread texture.
- Adjust water temperature according to kitchen ambient temperature to optimize yeast activity and dough development.
- Keep butter blocks cold and frozen until used to ensure clean layering inside the dough.
- Use dark baking trays with a thin butter coating for a crispier bottom crust.
- Do not over-spray water on the dough before baking as it may toughen the crust.
- Proofing times vary based on kitchen temperature; warmer kitchens proof faster.
- If dough resists shaping or shrinks, allow it to rest longer before continuing to roll or shape.
- Rotate trays during baking for even color; keep an eye on the bread especially in the last minutes to avoid burning.
- Best eaten fresh on baking day for soft buttery texture.
- Prep Time: 20 minutes
- Cook Time: 18 minutes
- Category: Bread
- Method: Baking
- Cuisine: Japanese